After completing my storyboard, I realised that I would need to find some interesting materials to texture my object with in my animation, this tutorial caught my eye because of how vibrant and interesting the textures were as well as the object itself. The tutorial was made by Patrick Foley:
Initial stage of the tutorial focused on the different render settings. Overall, the physical renderer was used and I learnt a lot about it that I never knew before – the physical renderer setting is a special renderer, including a physical camera that will be used in order to render photographic effects such as real 3D Depth of Field, Motion Blur, Vignetting, Chromatic Aberration etc. The benefits of using the physical renderer is that its faster than using the standard renderer when dealing with images with multiple, combined effect listed previously – this will be a good setting for myself to use within my project as some of the scene will have Depth of Field enabled, meaning that the physical renderer will render it out quicker when compared to the standard. Additionally, Ambient Occlusion and Global Illumination were selected too – Ambient Occlusion (AO) determines the degree to which each visible surface point is exposed and darkens it accordingly & Global Illumination (GI) is the interaction of light between different objects within a scene (reflects light of different materials to illuminate it).
Alongside of the render settings being set-up, a camera was also added to the scene and angled accordingly – when it was added, the co-ordinates were all zeroed out so that when the shape was added it was centred perfectly. Although this is something very simplistic, it was also something I had never through about doing before, when testing I had always added the camera and roughly placed it in the centre of the screen, this process an guarantee that the object will always be centred 100% of the time (Shortcut letter ‘O’).
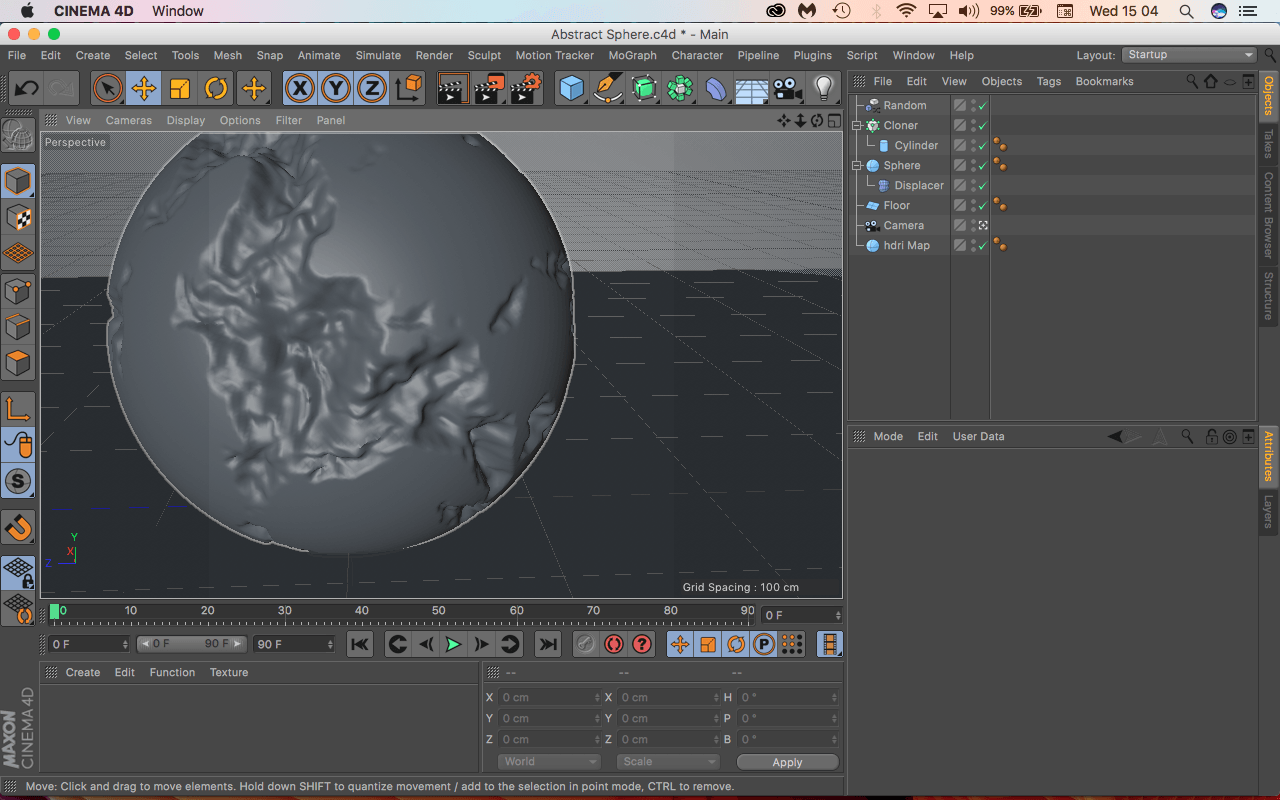
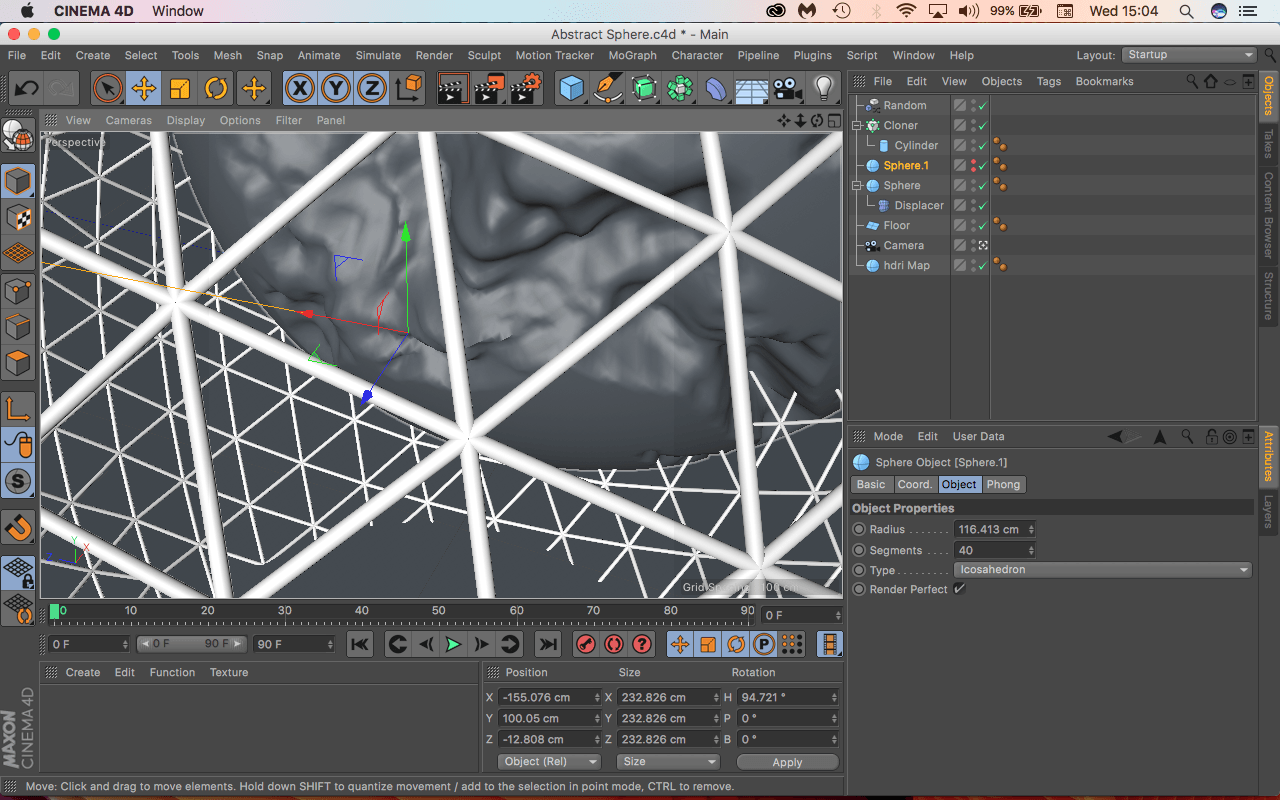
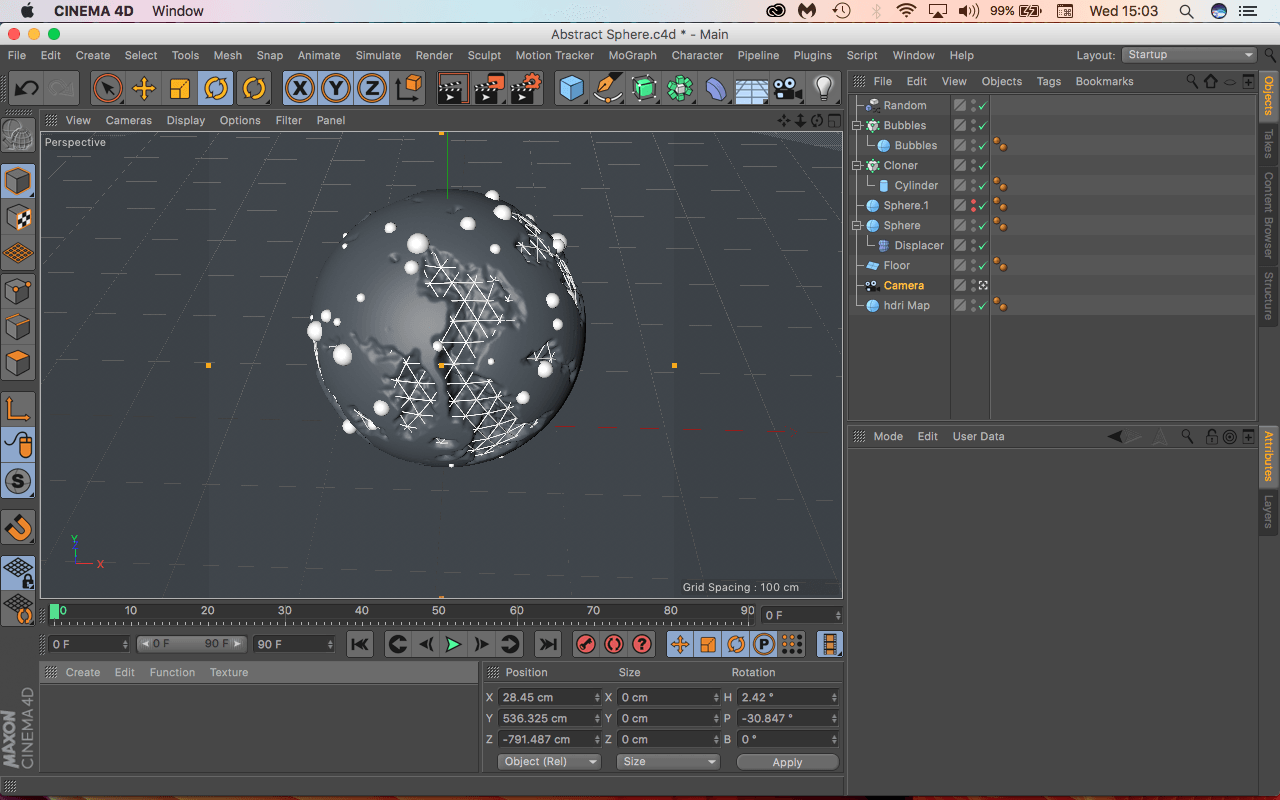
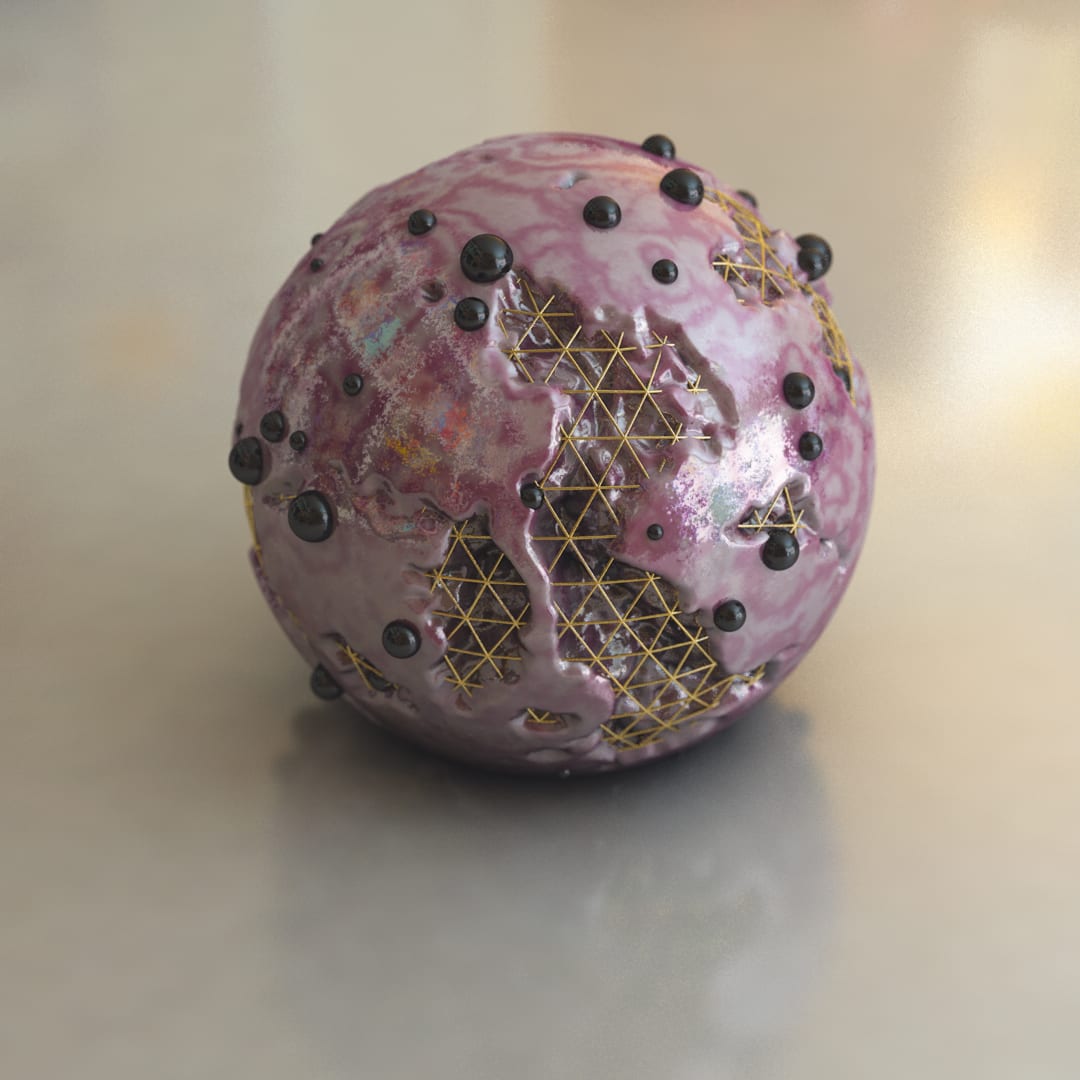
The second key part to the tutorial was the creation process of the objects. The main project consisted of 3 objects: A main sphere, An atom Array and Smaller surface spheres. It was interesting to see the how the objects were being layered up so that the atom array or the mesh was sitting inside of the larger sphere and also the smaller sphere were bing attached to the surface – I feel that the noise added to the larger sphere under Displacer > Shading > Shader > Noise made it more interesting and actually allowed for the atom array to look more organically integrated into the object. In addition, I didn’t know that I was able to add object to another objects surface under Object > Sphere & Up Vector > Surface within the cloner settings – this will be useful if I want to add any extra shapes to any object within my animation.
The last core part looked at the materials used to texturise the objects – the main sphere consisted of a really aesthetically pleasing marble effect that was made within the colour section of the material, I had full creative control over the colours as it gave me a gradient to select colour from as well as allowing me to control the strength of it too. The atom array consisted of a reflectance channel, that was coloured a faint yellow colour, as the underlaying properties of the object were very shiny, adding the yellow above made it appear to be gold in colour. And finally, the smaller surface sphere has very similar material characteristics to the larger sphere, just without the marbles and noise effect.
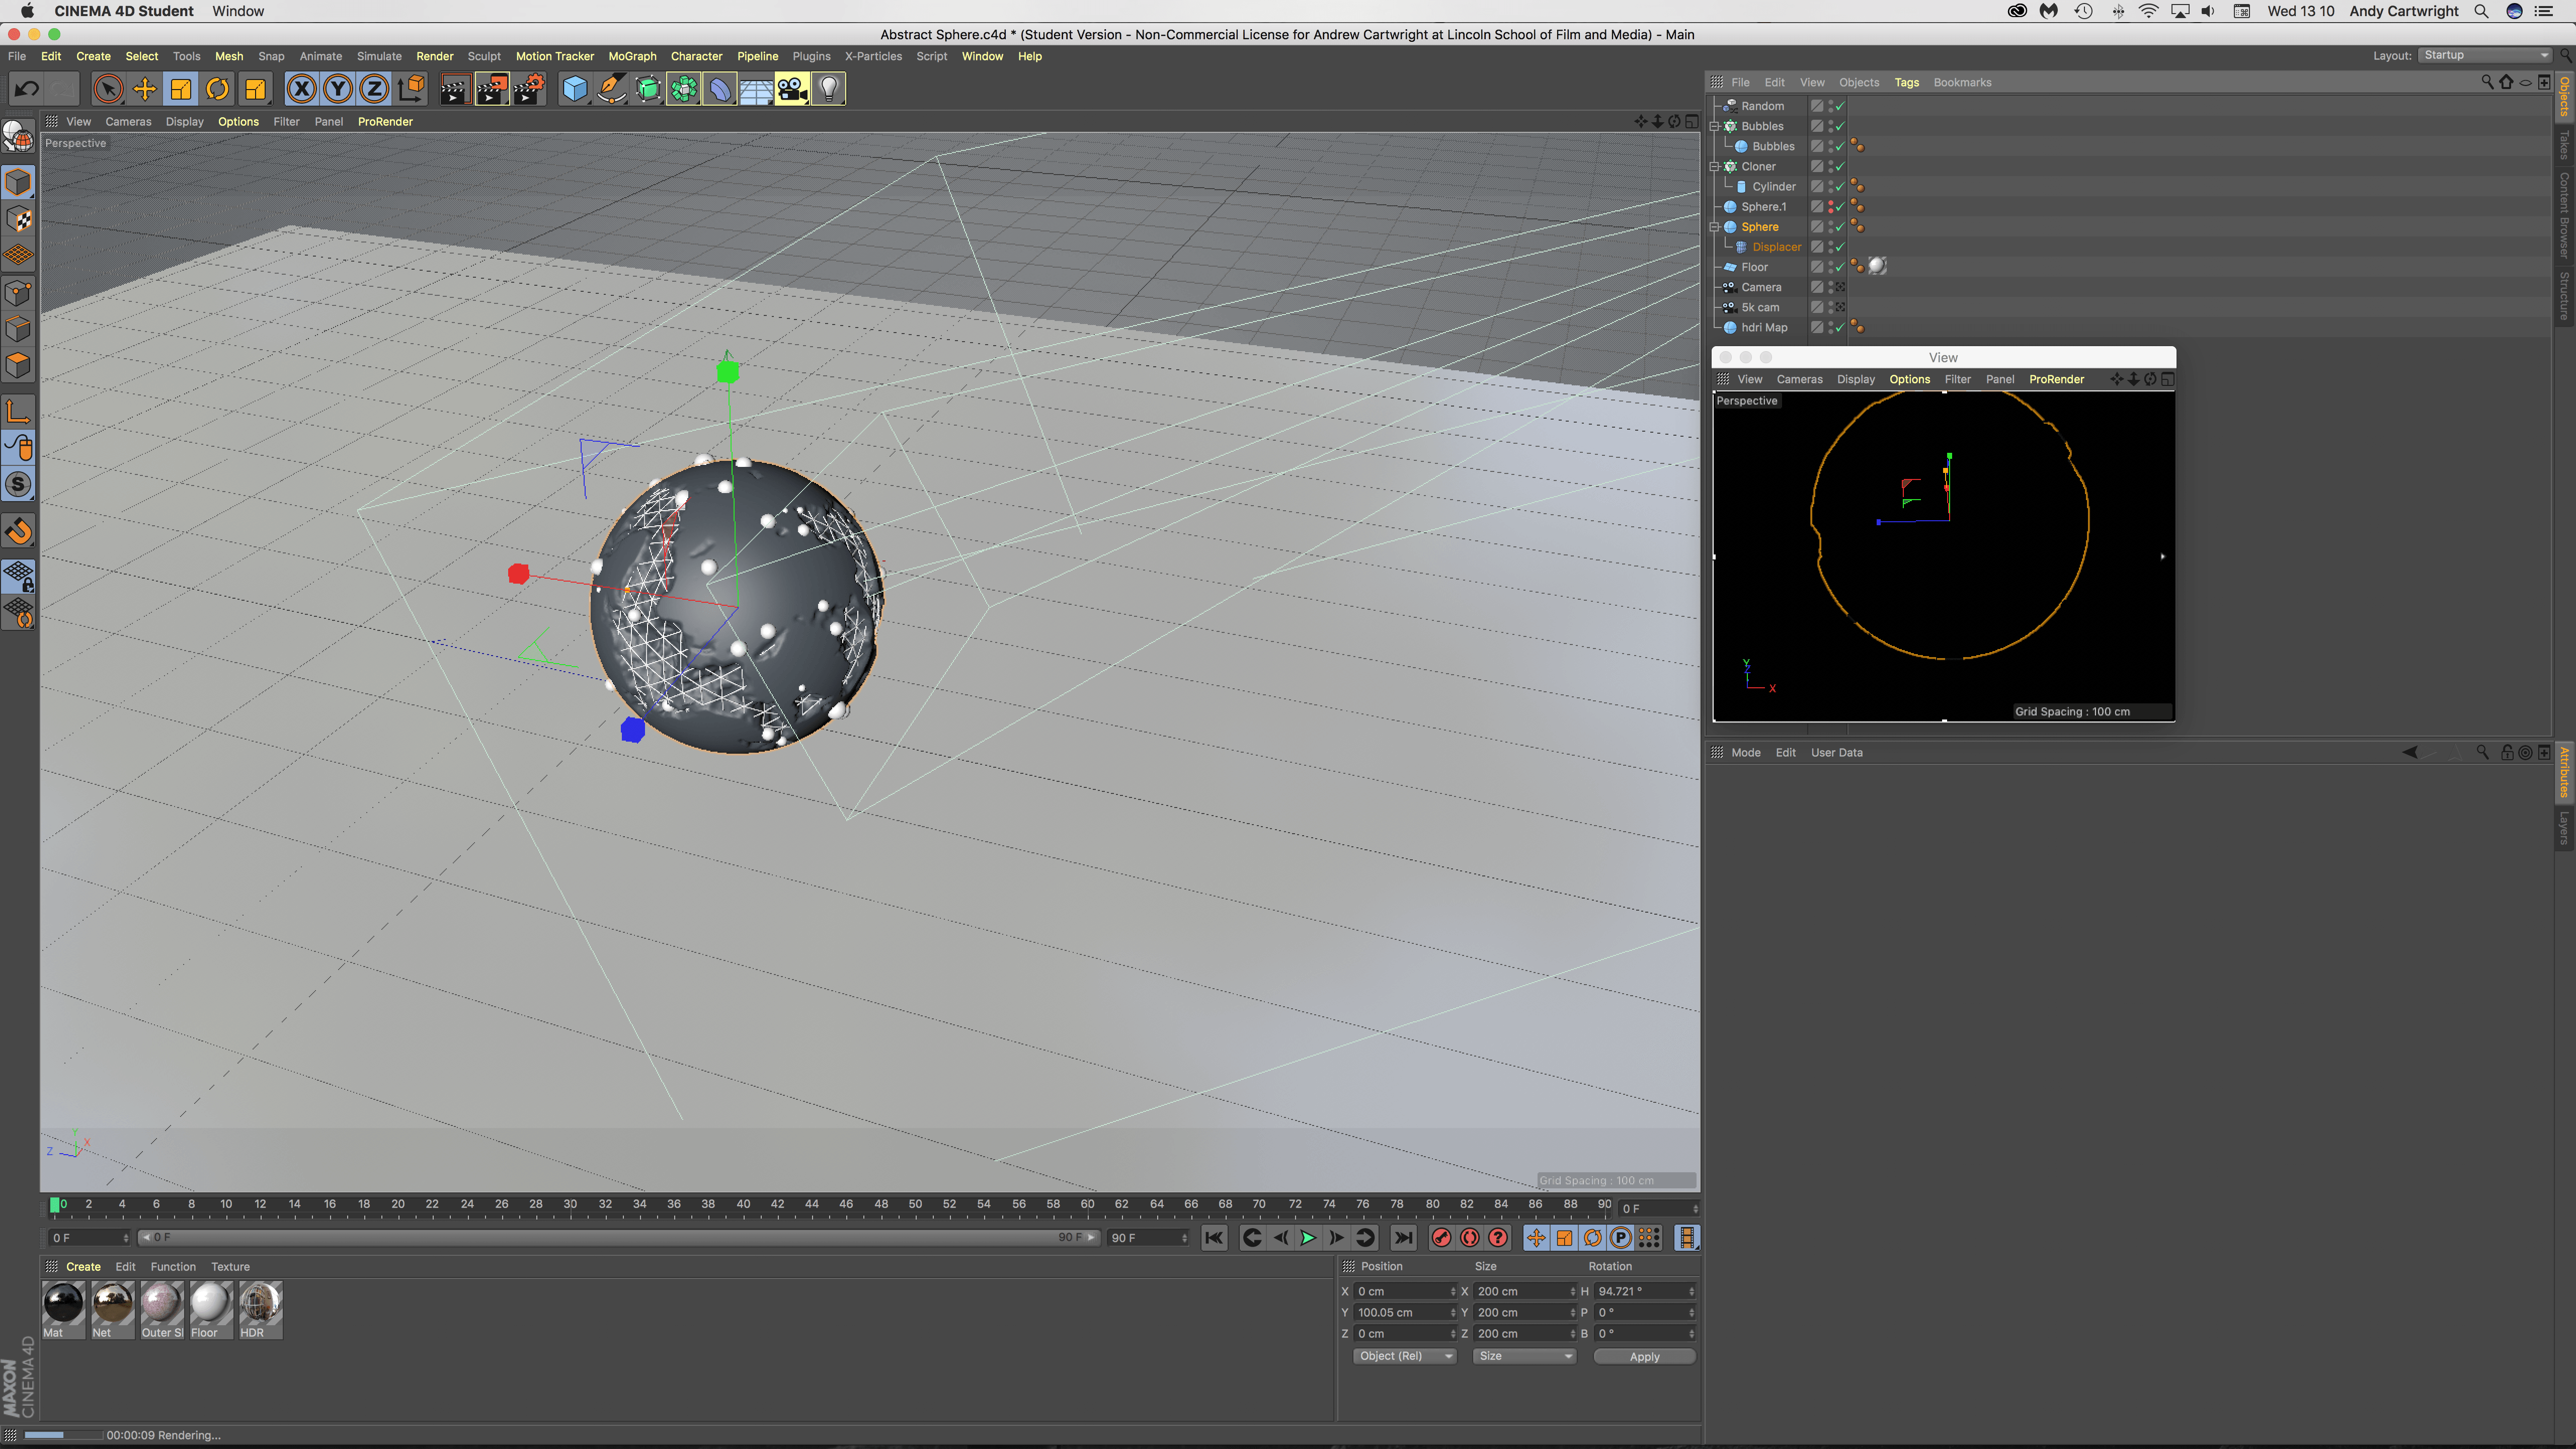
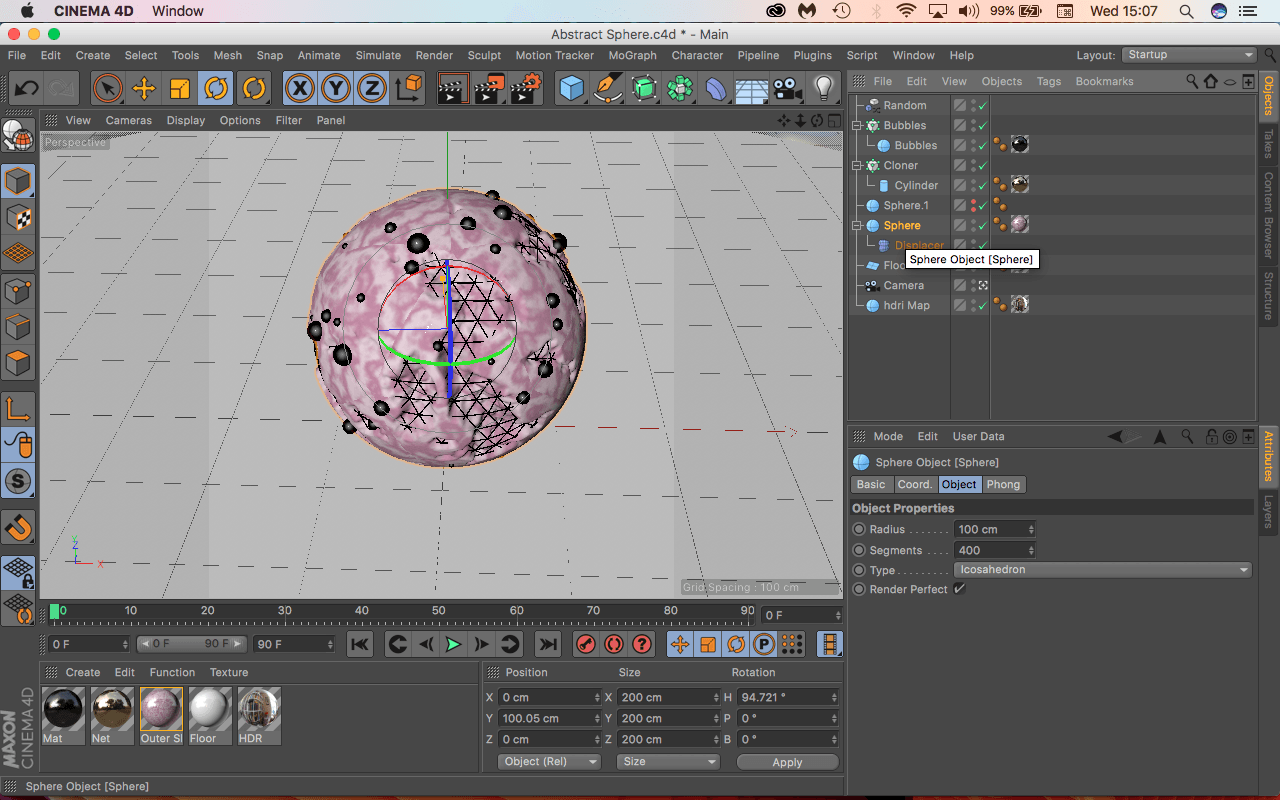
Another interesting piece of information that I found when following the tutorial was that Patrick used another display panel to view his project. I found this very useful when creating this tutorial as it was continuously rendering the scene allowing me to see what the object would look like with more detail and additionally, it also allowed me to fix the panel view to the camera – further meaning I could tweak it the editing panel and see a live preview of what the changes looked it. I feel that this would be extremely useful for my project, however, it is key to note that the performance of the instant rendering slowed down dramatically when textures were added, especially those that were reflective (like the gold mesh). The screen grab below shows how the primary large editing panel allowed me to make changes to the project while the smaller rendering panel gave me a live instant feedback.
The following screen grabs show my workflow within C4D and the renders are frames within my work:
Leave a comment