When explaining my project before, I have mentioned that I wanted to create a main central object – A geometric cube floating in space. To create this cube, I am going to utilise displacement mapping techniques within C4D to create square/rectangular protrusions or depressions which will help me achieve that geometric or industrial style that I desire. I have found a YouTube tutorial on this technique and its actual intended purpose is to make something similar as what I want to make, which is also very beneficial.
Following this tutorial, I started to create my own displacement map creating different sized rectangles and squares, overlapping them and then excluding them from each other – it is this element within the whole project which will really help to bring the displacement map alive. I feel that one aspect that I should be aware of is to not make the map too detailed as that will not only increase my rendering times dramatically but it also might not be visible from a distance. Below I have created a time-lapse of my creative process and I have also provided of the map.
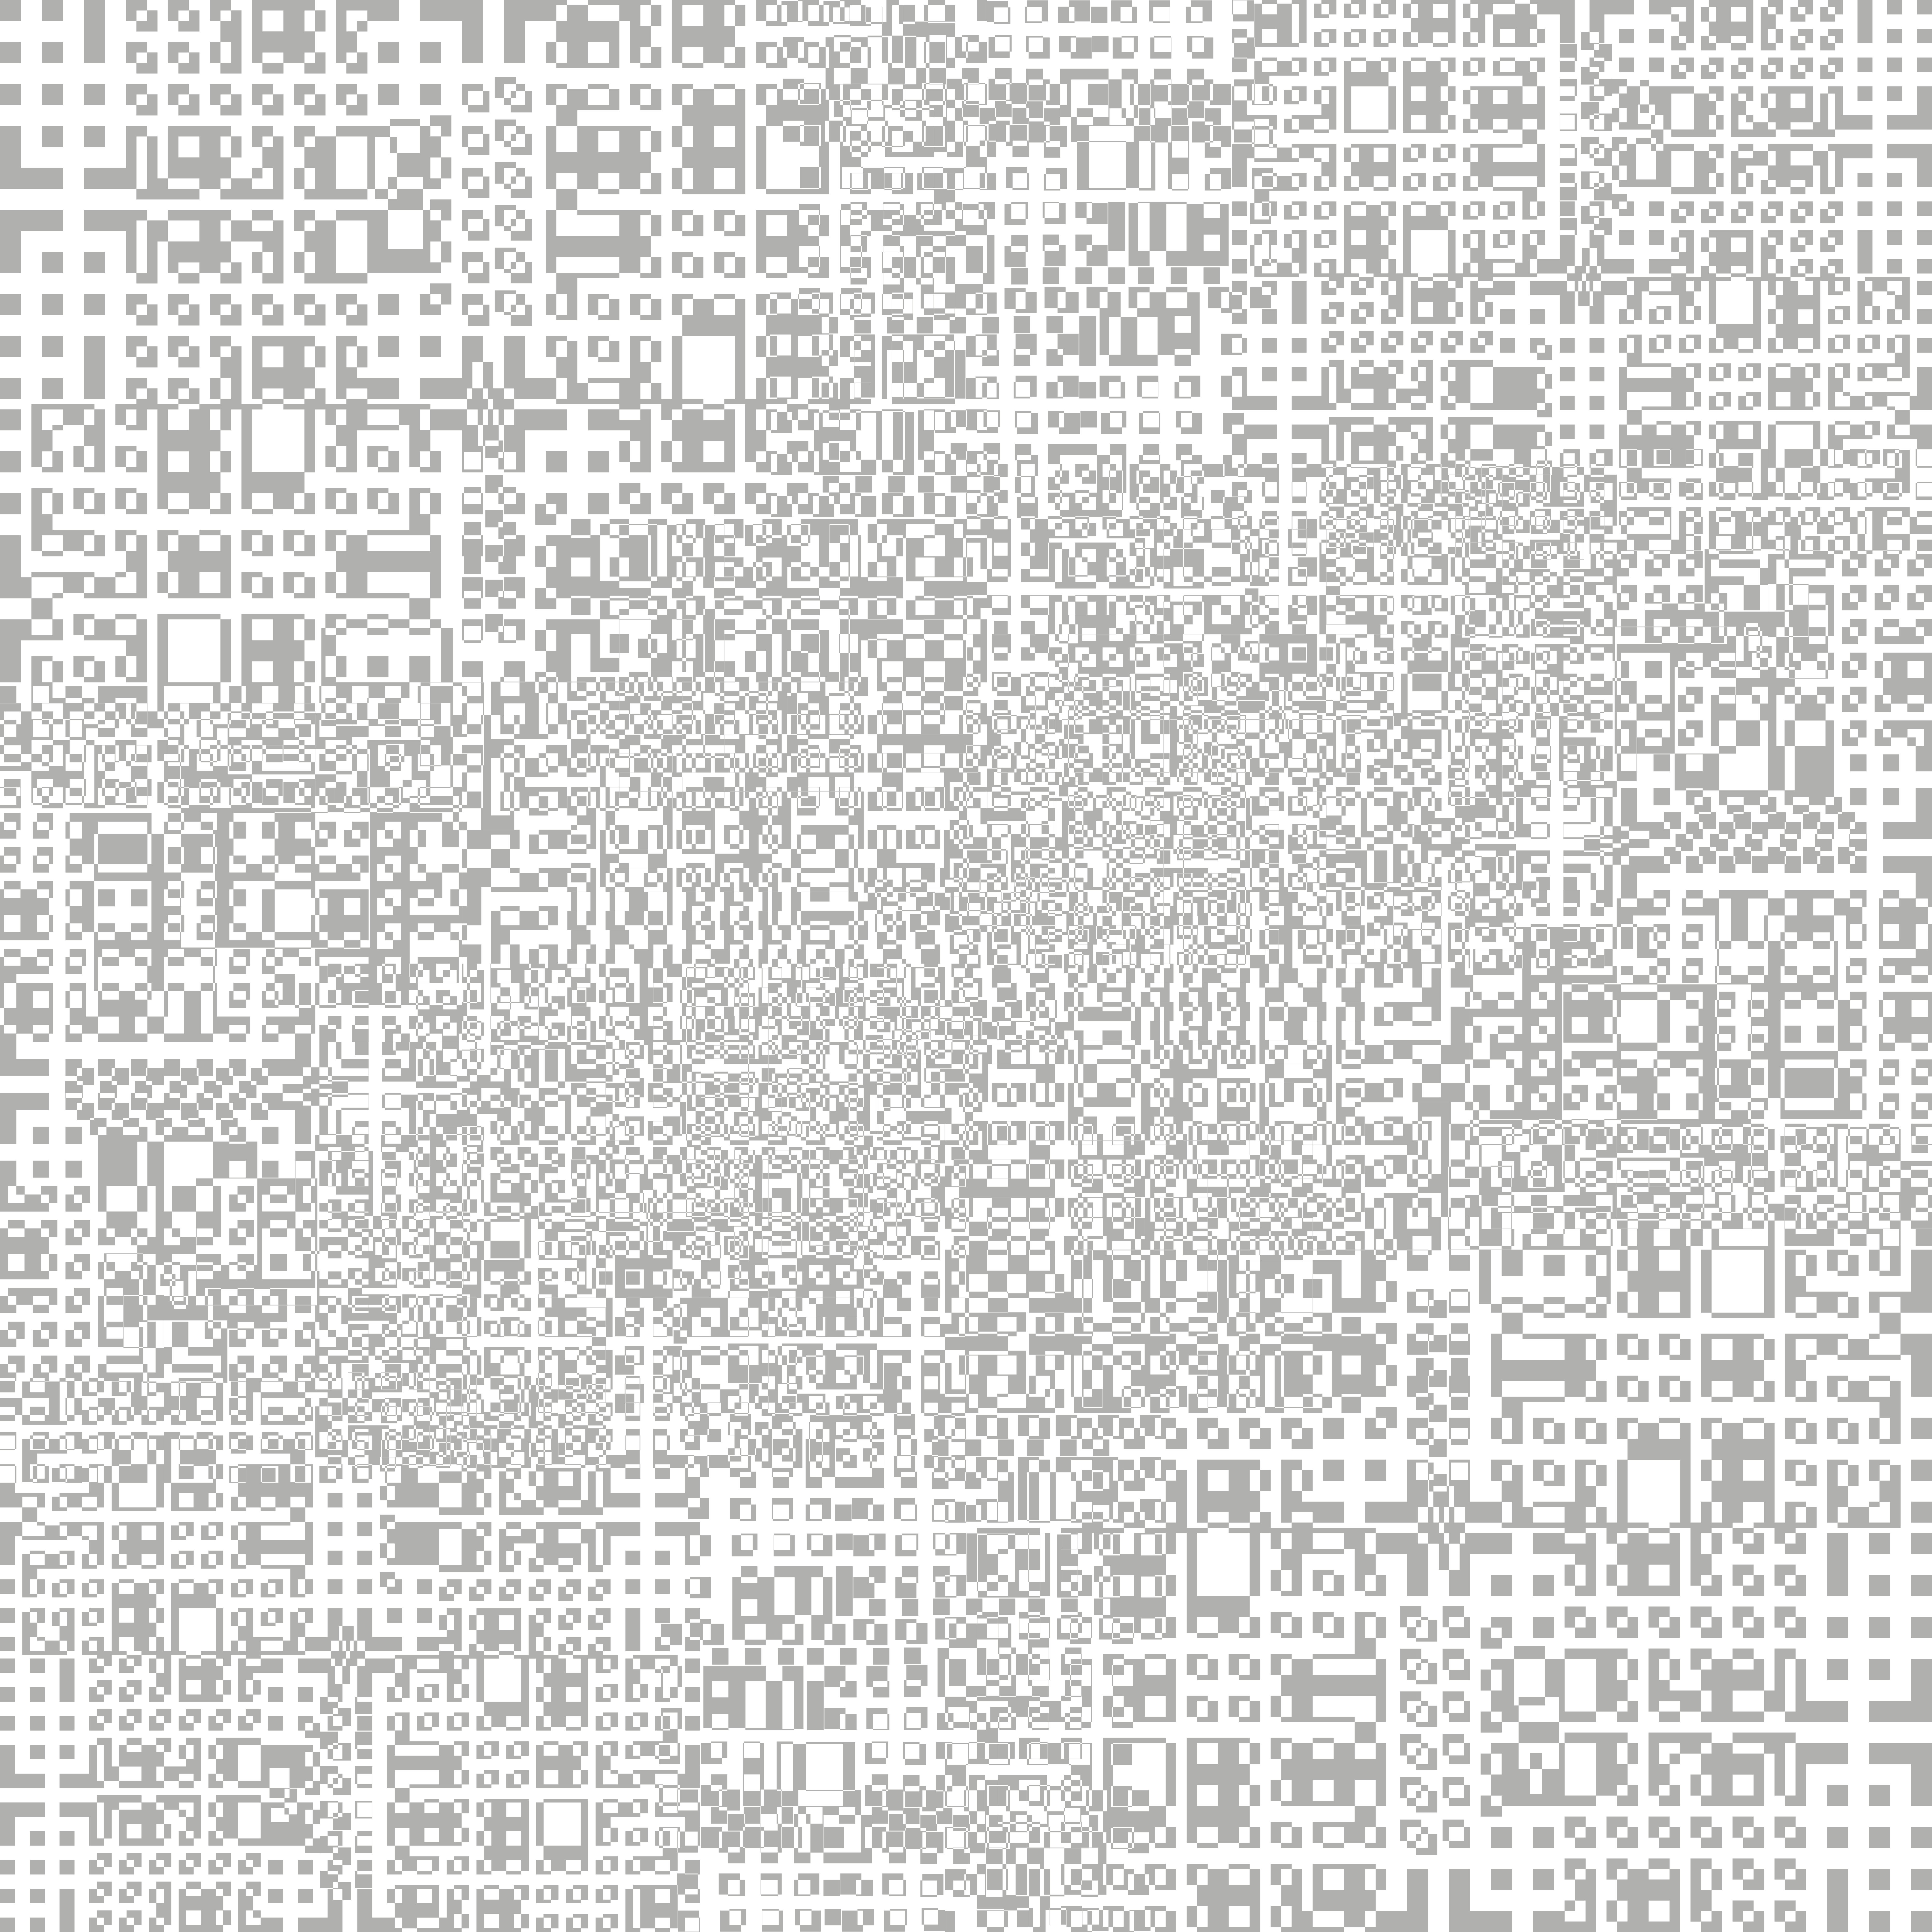
Overall, I think my displacement map looks good, it has lots of fine details which will hopefully create lots of small protrusions on the surface of the cube. When this is in the final project scene, I hope that with the correct lighting I will be able to camera all of the little details and make it look really interesting to the audience. The next stage of this task is to create a secondary map that will be layered on top of it to add even more variation and to also test it out within C4D to see whether my map gives me the desired effect.
Leave a comment