As my animation is coming towards the final stages of completion, I feel the need to research and test out different render settings in order to speed up my workflow. I often find that I spend a long time waiting for my renders to complete after making small changes which has a detrimental effect on my workflow. The video below gave me some useful times on how to speed rendering up:
Optimising Scenes in Cinema 4D from Luxx on Vimeo.
Overall, the tutorial Optimising Scenes in Cinema 4D focused on two crucial elements: 1) Having low render settings for the development stage of the animation and 2) Having high render settings for the final render when the animation is complete.
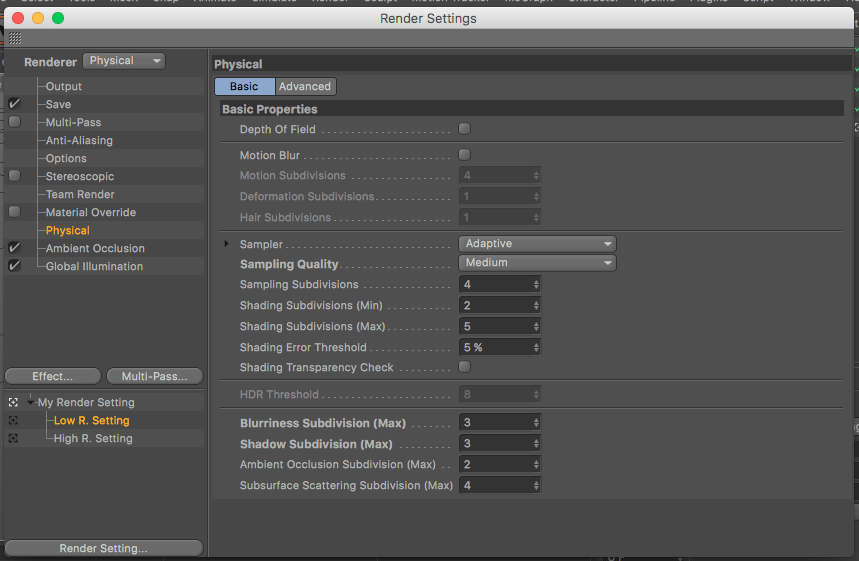
Low Render Settings:
Within the tutorial it went through each individual setting, basically turning ever setting down a couple units so that the overall speed of the render is decreased. All of the settings were specific to the physical render engine which I intended to use anyway – the most significant alteration of the renderer was the Sample Quality, as the setting was changed to medium, this drastically changed the values within the setting which was, at first concerning as I thought it would provide enough detail. However, I later found out that this would be more than sufficient enough for development stages of project as it would allow for the render times to drop drastically which would further allow me to make alterations much faster.
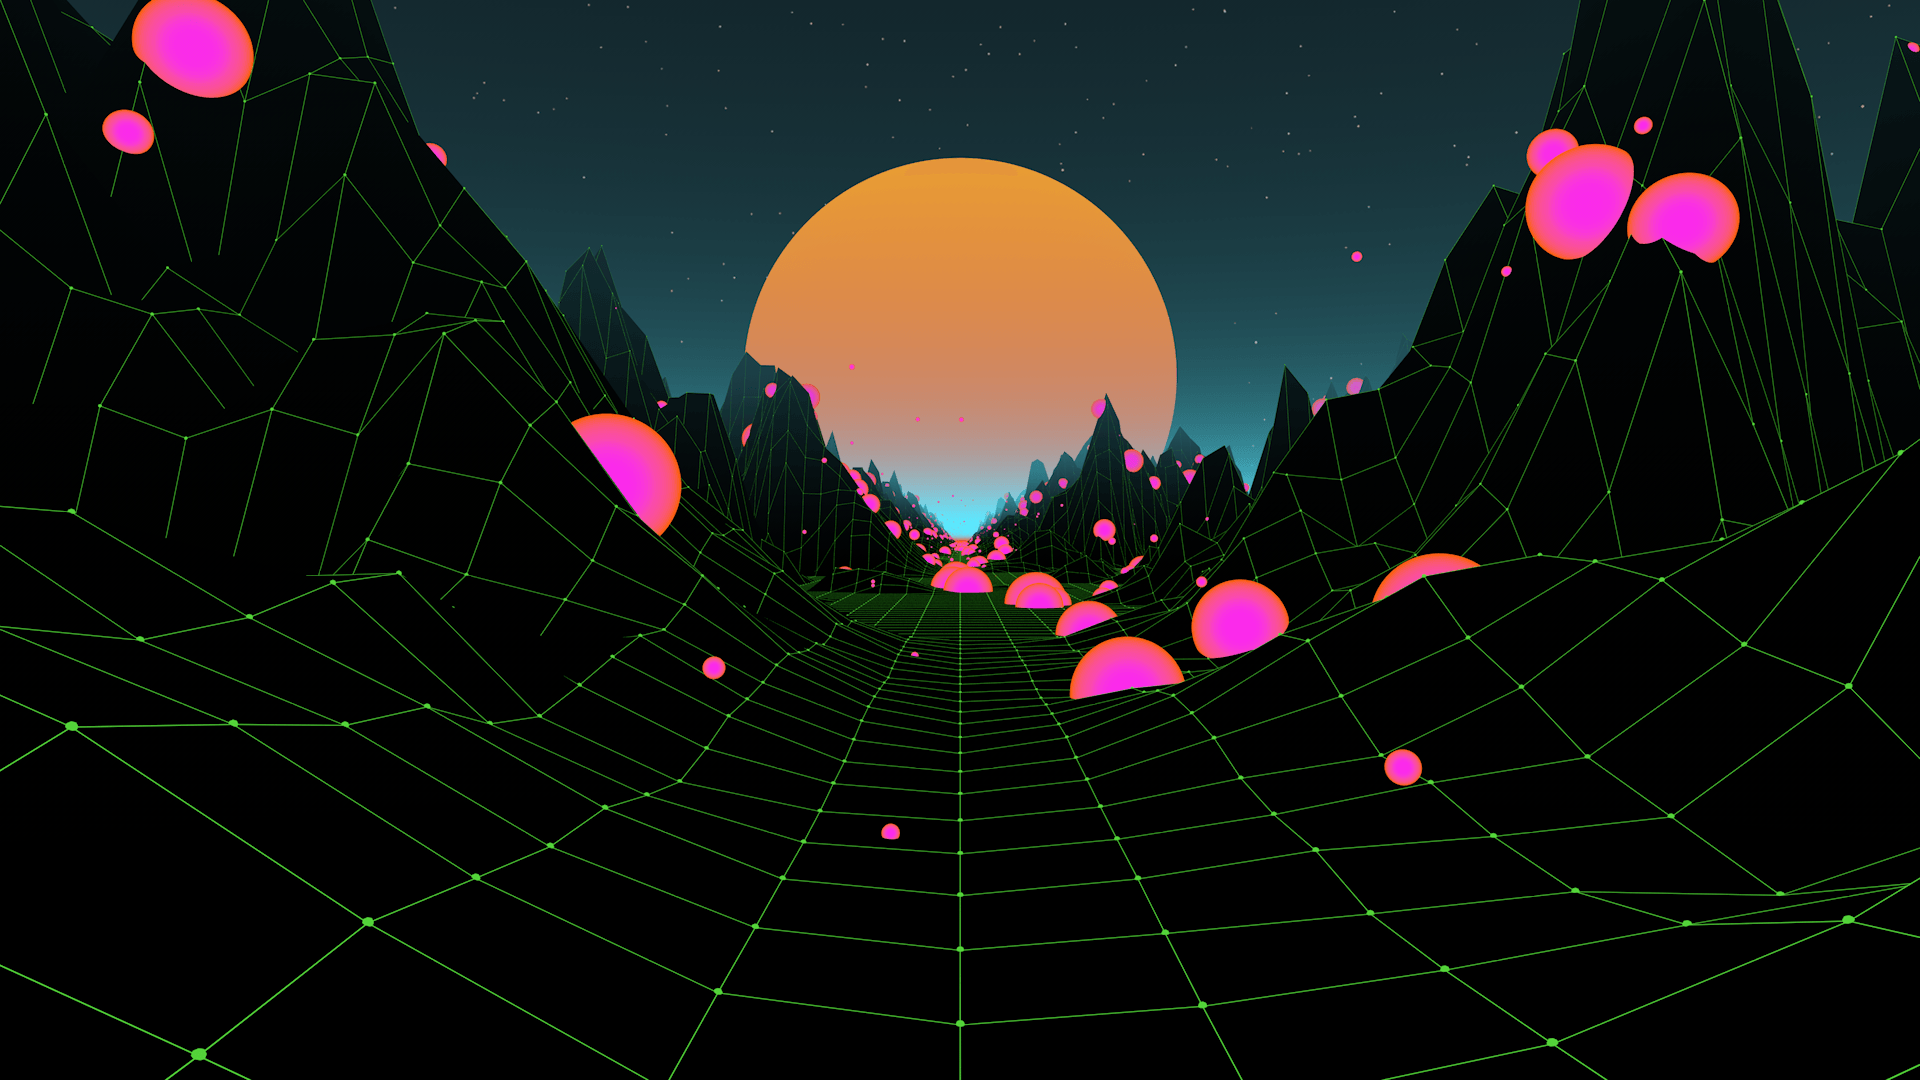
Example render using the low settings:
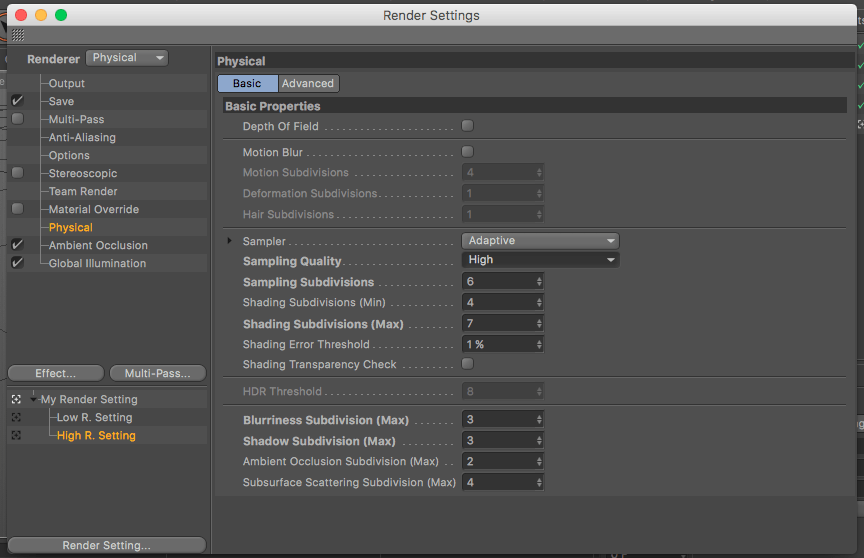
High Render Setting:
After I had used the low render setting to make the desired alterations to the animation, I had to figure out a higher setting for the final render which involved turning everything up. As I was planning on using the physical renderer, I decided to turn the default Sampling Quality setting from medium in the low setting to high – this further bumped up the units to produce more detail and most notably decreased the error threshold to 1%. After conducting a test render, I felt that I could have changed the Sampling Subdivisions up a couple of units more to produce more detail which would be desirable at the cost of a bit extra time, which I feel it is worth.
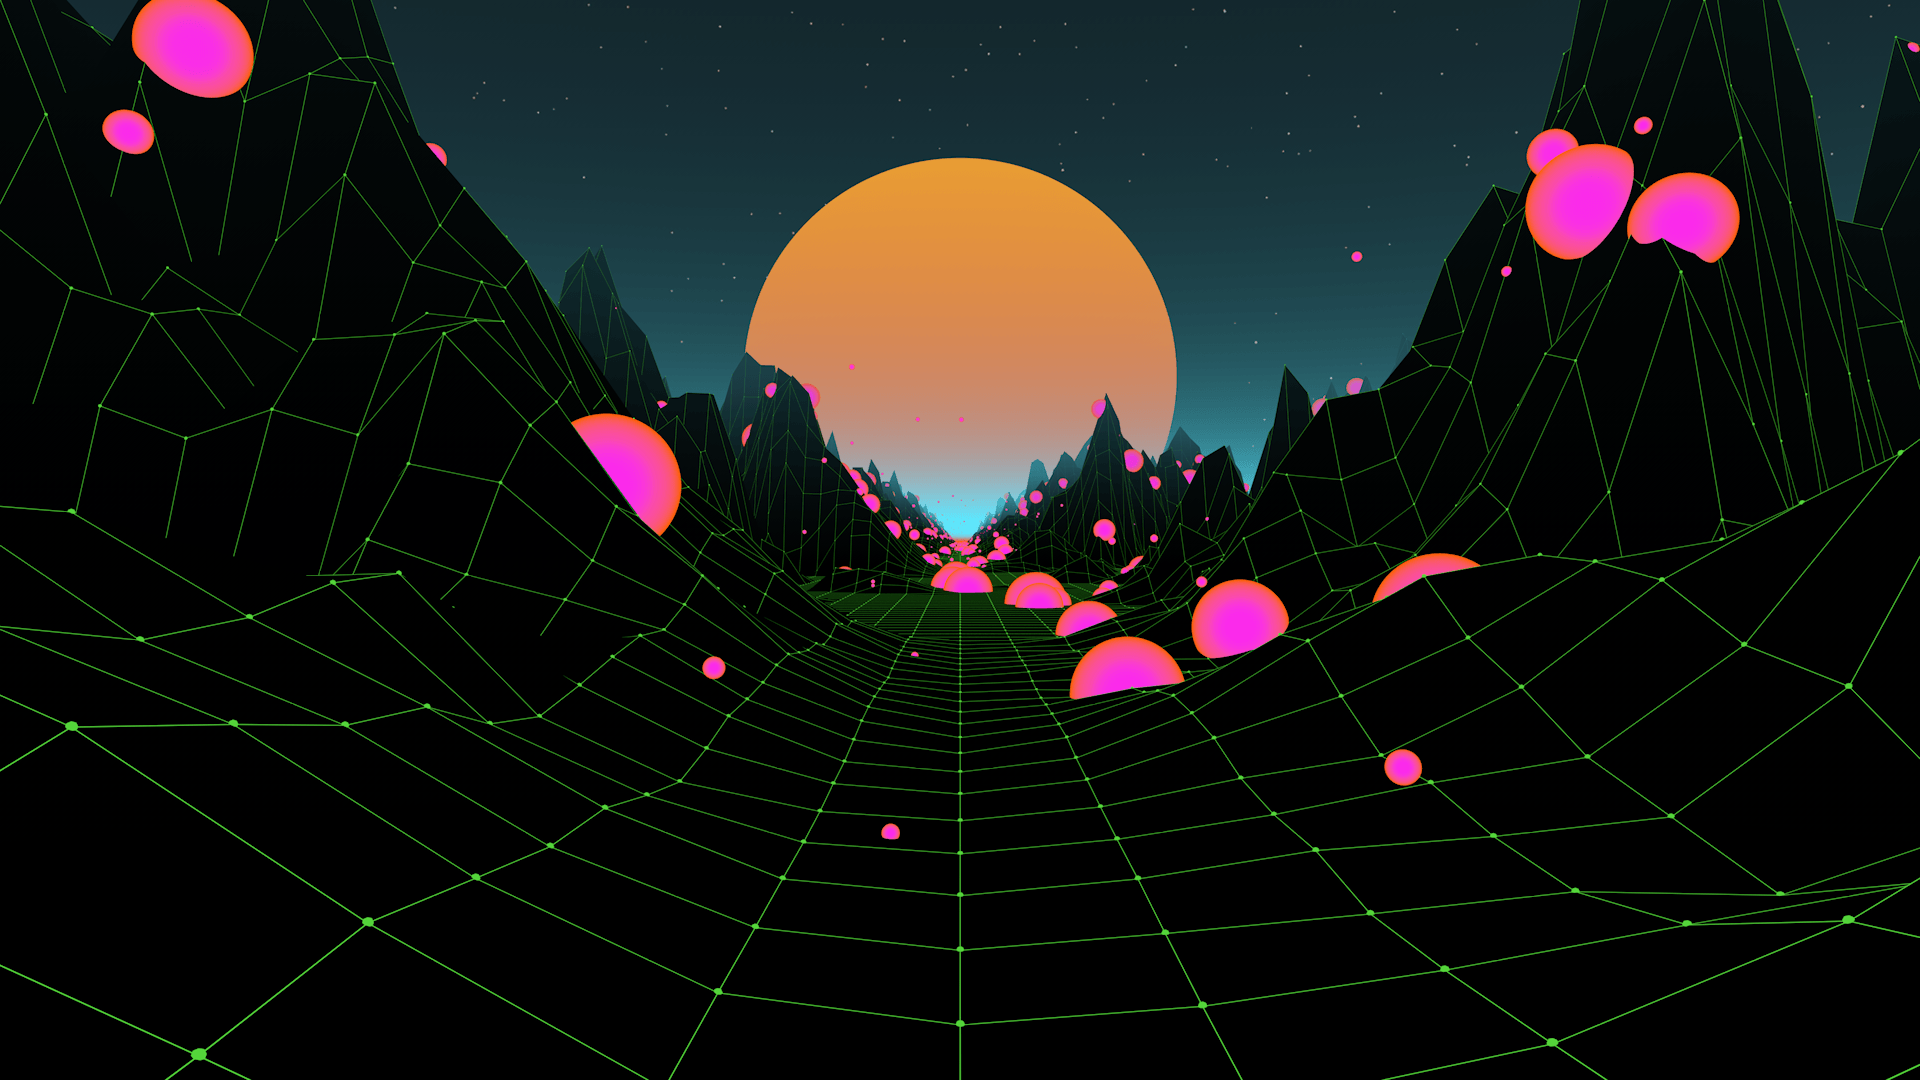
Example render using the high settings:
Conclusion
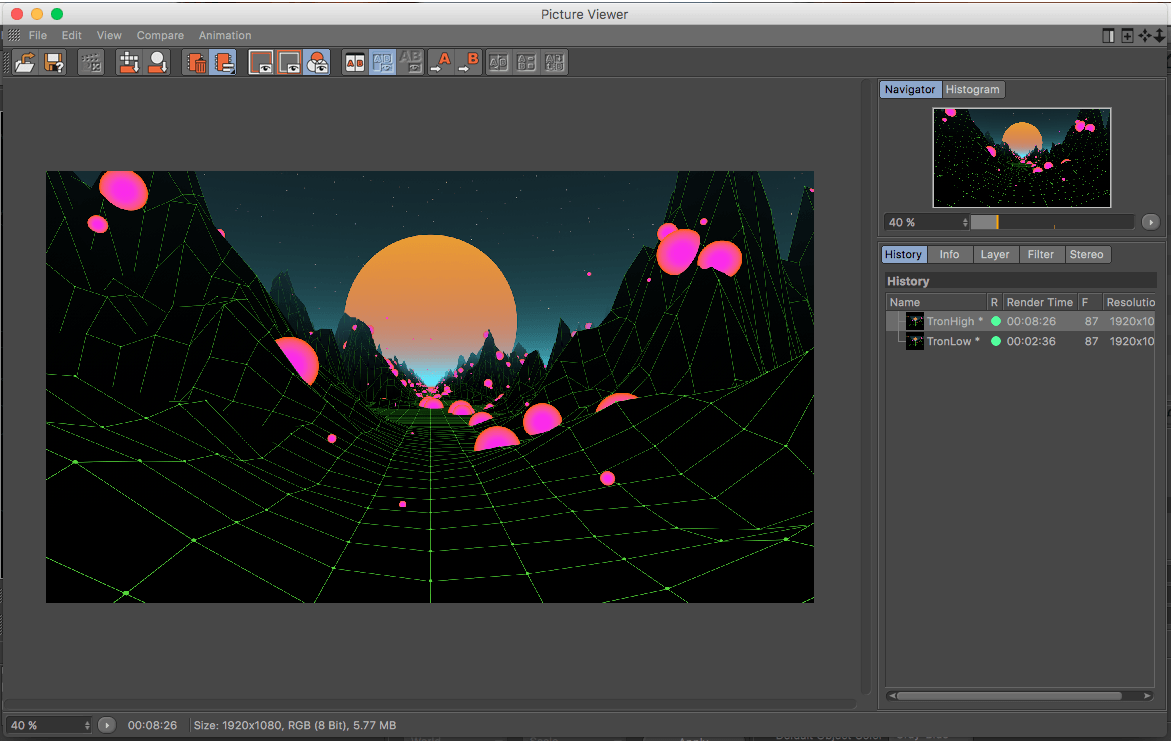
Using the low settings will produced really fast renders which will in turn speed up my workflow as I will be able to make small changes quickly to my animation, however, this speed will come at a sacrifice as the quality wont be as good. Oppositely, using the high settings will produce really high quality renders which will be very beneficial when coming into after effects as it’ll look very aesthetically pleasing, however, this quality will also come at a sacrifice as the time it will take to render each time will be very long. The image below shows two test renders I conducted with the different render settings. Overall, I feel that both images look identical on screen which is very surprising, however, the low render setting took far less time in comparison to the high render setting – approximately 5 mins 10 sec less. The low setting would be far more beneficial for me to use in the development stage of the animation as it will allow for render times to decrease, which in turn will increased my workflow allowing me to change and tweak settings fast. After the development stage has been completed, I can then switch to the high render setting which will give me better detail ready to export to After Effects.
Leave a comment