Displacement Map – Part 1

When explaining my project before, I have mentioned that I wanted to create a main central object – A geometric cube floating in space. To create this cube, I am going to utilise displacement mapping techniques within C4D to create square/rectangular protrusions or depressions which will help me achieve that geometric or industrial style that I desire. I have found a YouTube tutorial on this technique and its actual intended purpose is to make something similar as what I want to make, which is also very beneficial.

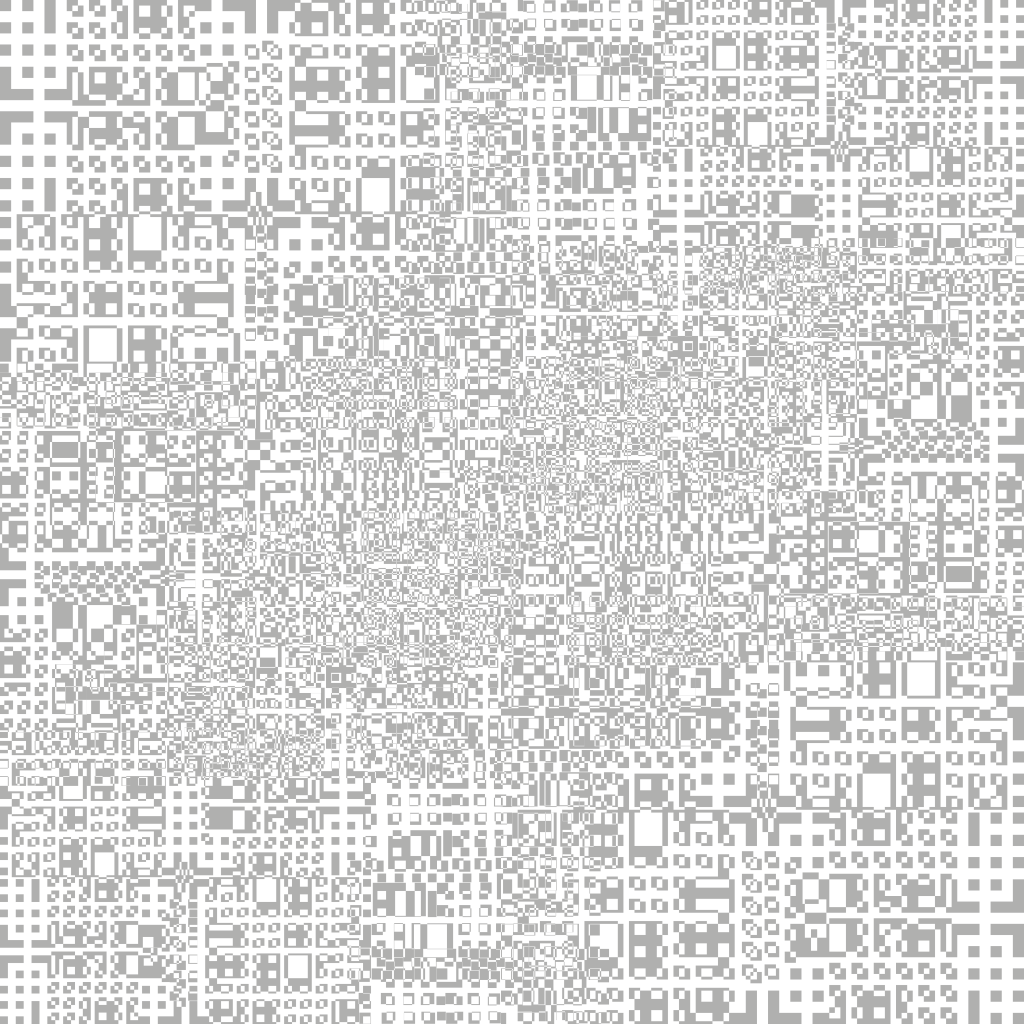
Following this tutorial, I started to create my own displacement map creating different sized rectangles and squares, overlapping them and then excluding them from each other – it is this element within the whole project which will really help to bring the displacement map alive. I feel that one aspect that I should be aware of is to not make the map too detailed as that will not only increase my rendering times dramatically but it also might not be visible from a distance. Below I have created a time-lapse of my creative process and I have also provided of the map.

Displacementmap2

Overall, I think my displacement map looks good, it has lots of fine details which will hopefully create lots of small protrusions on the surface of the cube. When this is in the final project scene, I hope that with the correct lighting I will be able to camera all of the little details and make it look really interesting to the audience. The next stage of this task is to create a secondary map that will be layered on top of it to add even more variation and to also test it out within C4D to see whether my map gives me the desired effect.
Rigid Body Testing – Success & Failure

Success:

Within my animation/C4D I will be heavily using rigid body tags and physics to make my spheres or the ring of spheres seem more realistic – A rigid body tag allows for object within the software to have a hard physical surface, so that when it contacts another object with similar properties, they collide and bounce off each other. I have experimented with this tag inside of C4D to produce the video below, it shows a red cube falling and landing on an uneven landscape. I was really surprised to see how well the cube reacted within the software as it already looked realistic without having to change any of the settings – however, it was key to note that this was a 3 second animation (90 Frames) and took over 4 hours to render on a high quality setting with Ambient Occlusion & Global Illumination enabled, I will have to leave enough time before the deadline to allow everything to be rendered.

Failure:

To further push my skills with the rigid body physics, I tried to apply the same techniques but on a sphere instead so that when it collided with another sphere for example, they bounced off each other and reacted in a realist manner. However, my attempt at this failed – I was unable to get the spheres to react in the way I wanted, I put one sphere into a cloner and then into a random effector to produce a large cluster of different sizes objects. I then further put a rigid body tag on the original object, expecting the touching spheres to be pushed apart but they had a more dramatic effect of exploding – from this point onwards I was unable to get the touching spheres to separate without exploding violently, this will have to be another area to research not only in C4D but also in X-Particles as this will be the system I will use to make the ring of spheres for my animation.

Motion Graphic Testing

Within my scene, whenever the audience first see’s the geometric cube I want a bit of motion graphics work to ‘grow’ from the cube and reveal the name of the object. This is most notably done in Guardians of the Galaxy where the main characters travel to a new planet, the decoder effect is then used to reveal the planet name to the audience as well as giving conventional planetary co-ordinates to further denote the space/travelling theme. To replicate this, I have found a text effect within Adobe After Effects called ‘Decoder’ which randomises each letter of the desired text, and within a specific timeframe it flickers through a select number of letters to reveal the correct one (and this is done one letter at a time, creating a really pleasing effect).

The video above is the final iteration of the test and clearly demonstrates the aesthetic I’m trying to go for – this will be of a much higher quality when it comes to final piece and will be coloured accordingly, however, the main objective of this was to see if I could do it. Again, when it comes tot he final piece I aim to use the motion tracker inside of After Effects to make the graphic ‘stick’ to the geometric cube – further giving it a higher quality level.

Cinema 4D – Lighting Tests

Above is a video that was rendered in Cinema 4D and then edited in After Effect. It shows the different types of lights on a moving object, this allows us to see how the shape reacts under the light with a slightly reflective material and also allows us to see how the shapes shadows react under the different types of light. Overall, I think that some of the lights look a lot better than others – specifically the Area light as its slightly soft compared to the infinite light. Additionally, this will further help when it comes to creating my project as I will be able to illuminate my scene better – allowing the audience to fully see all of the objects when viewing.